-Part5- macOS Catalina 10.15 genuine mail application recovery
macOS Catalina 10.15 Genuine email app recovery edition
Posted on October 16, 2019
It seems that email data may disappear or be damaged after the previous 'macOS Catalina 10.15 Time Machine Emergency Response Edition', so we will explain how to migrate using the genuine email app.
Please note that this method is only possible for those who have a backup of macOS Catalina or earlier using Time Machine or other methods. Not possible if there is no backup of macOS Catalina or earlier or if it is unavailable.
If you have a backup but cannot use it due to a problem with Time Machine in macOS Catalina 10.15, we recommend checking 'macOS Catalina 10.15 Time Machine Emergency Response Edition' and returning here after you have resolved the issue.
!Other points to note!
- The library folder must also be visible in the backup.
- The visibility of Time Machine's library folder seems to be a problem with the environment settings, so the explanation of the library is omitted.
Also, Time Machine backups are currently unavailable in my environment.
However, since they are basically the same, I will explain using the folders of macOS Catalina 10.15.
(So only the next image is a composite image)
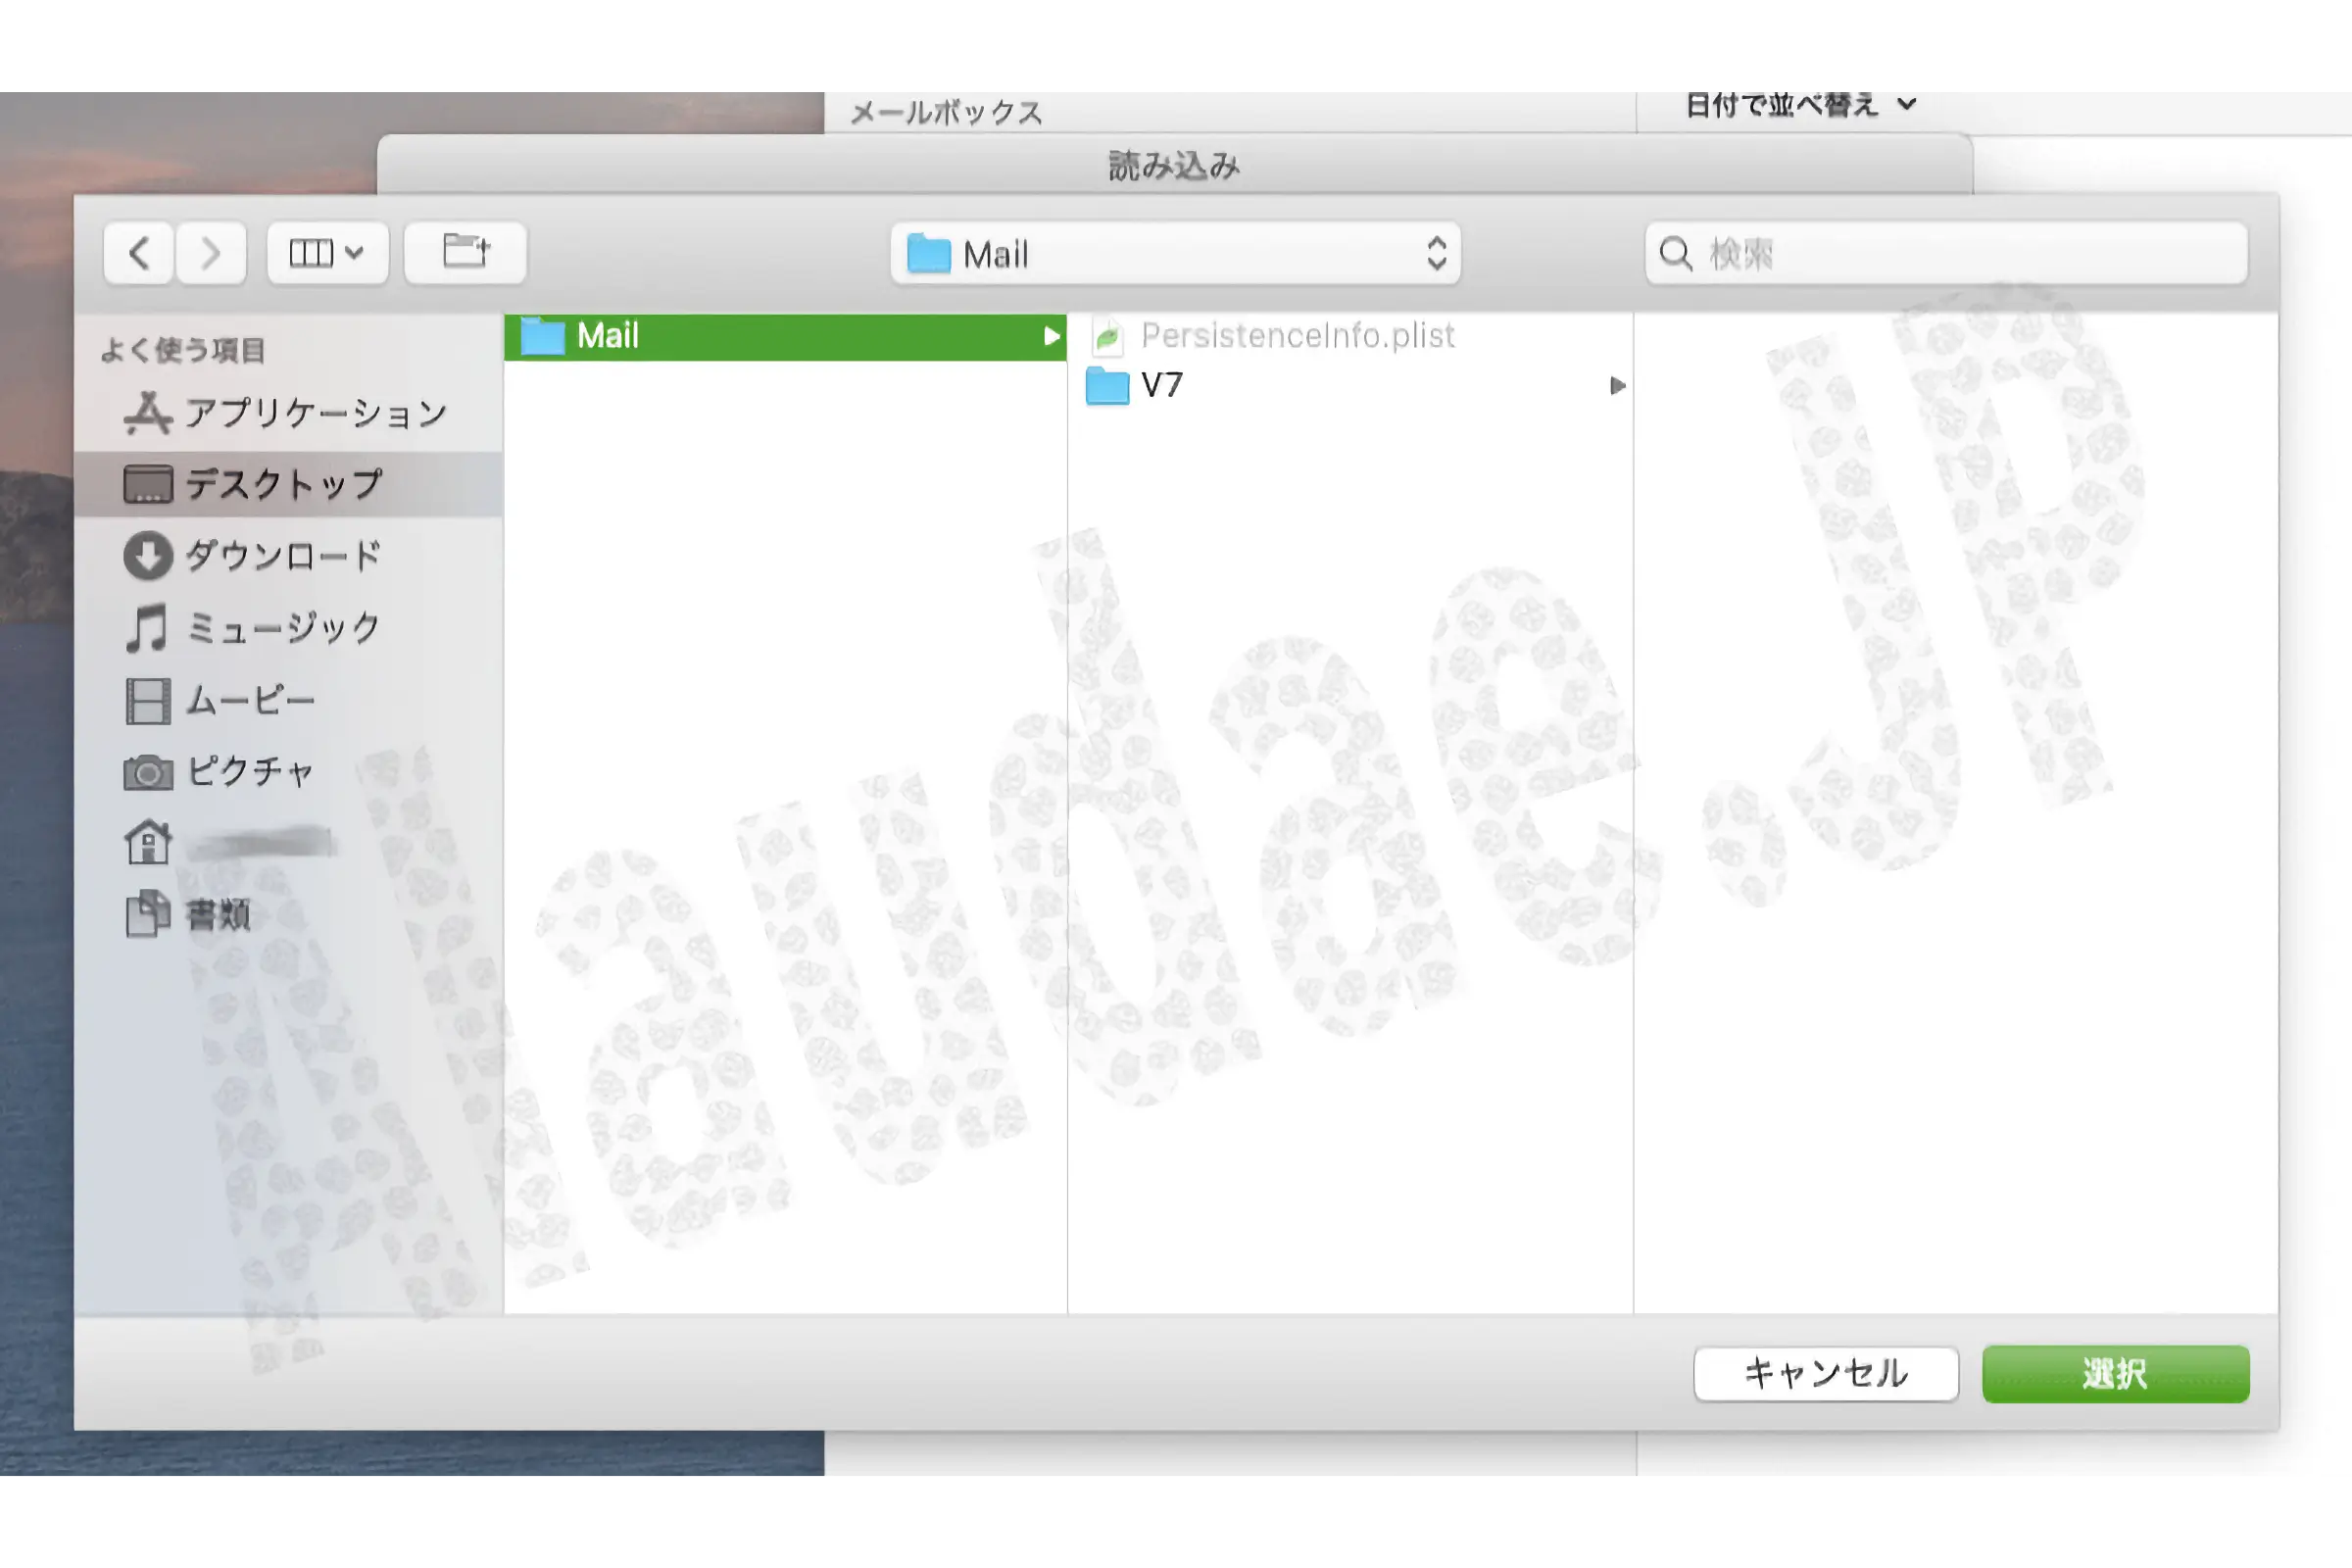
1. Find the Mail folder you want to migrate
(Although the environment is different) As with any single or multiple user accounts, it's important to first find a backup of the Mail folder of the account you want to migrate.
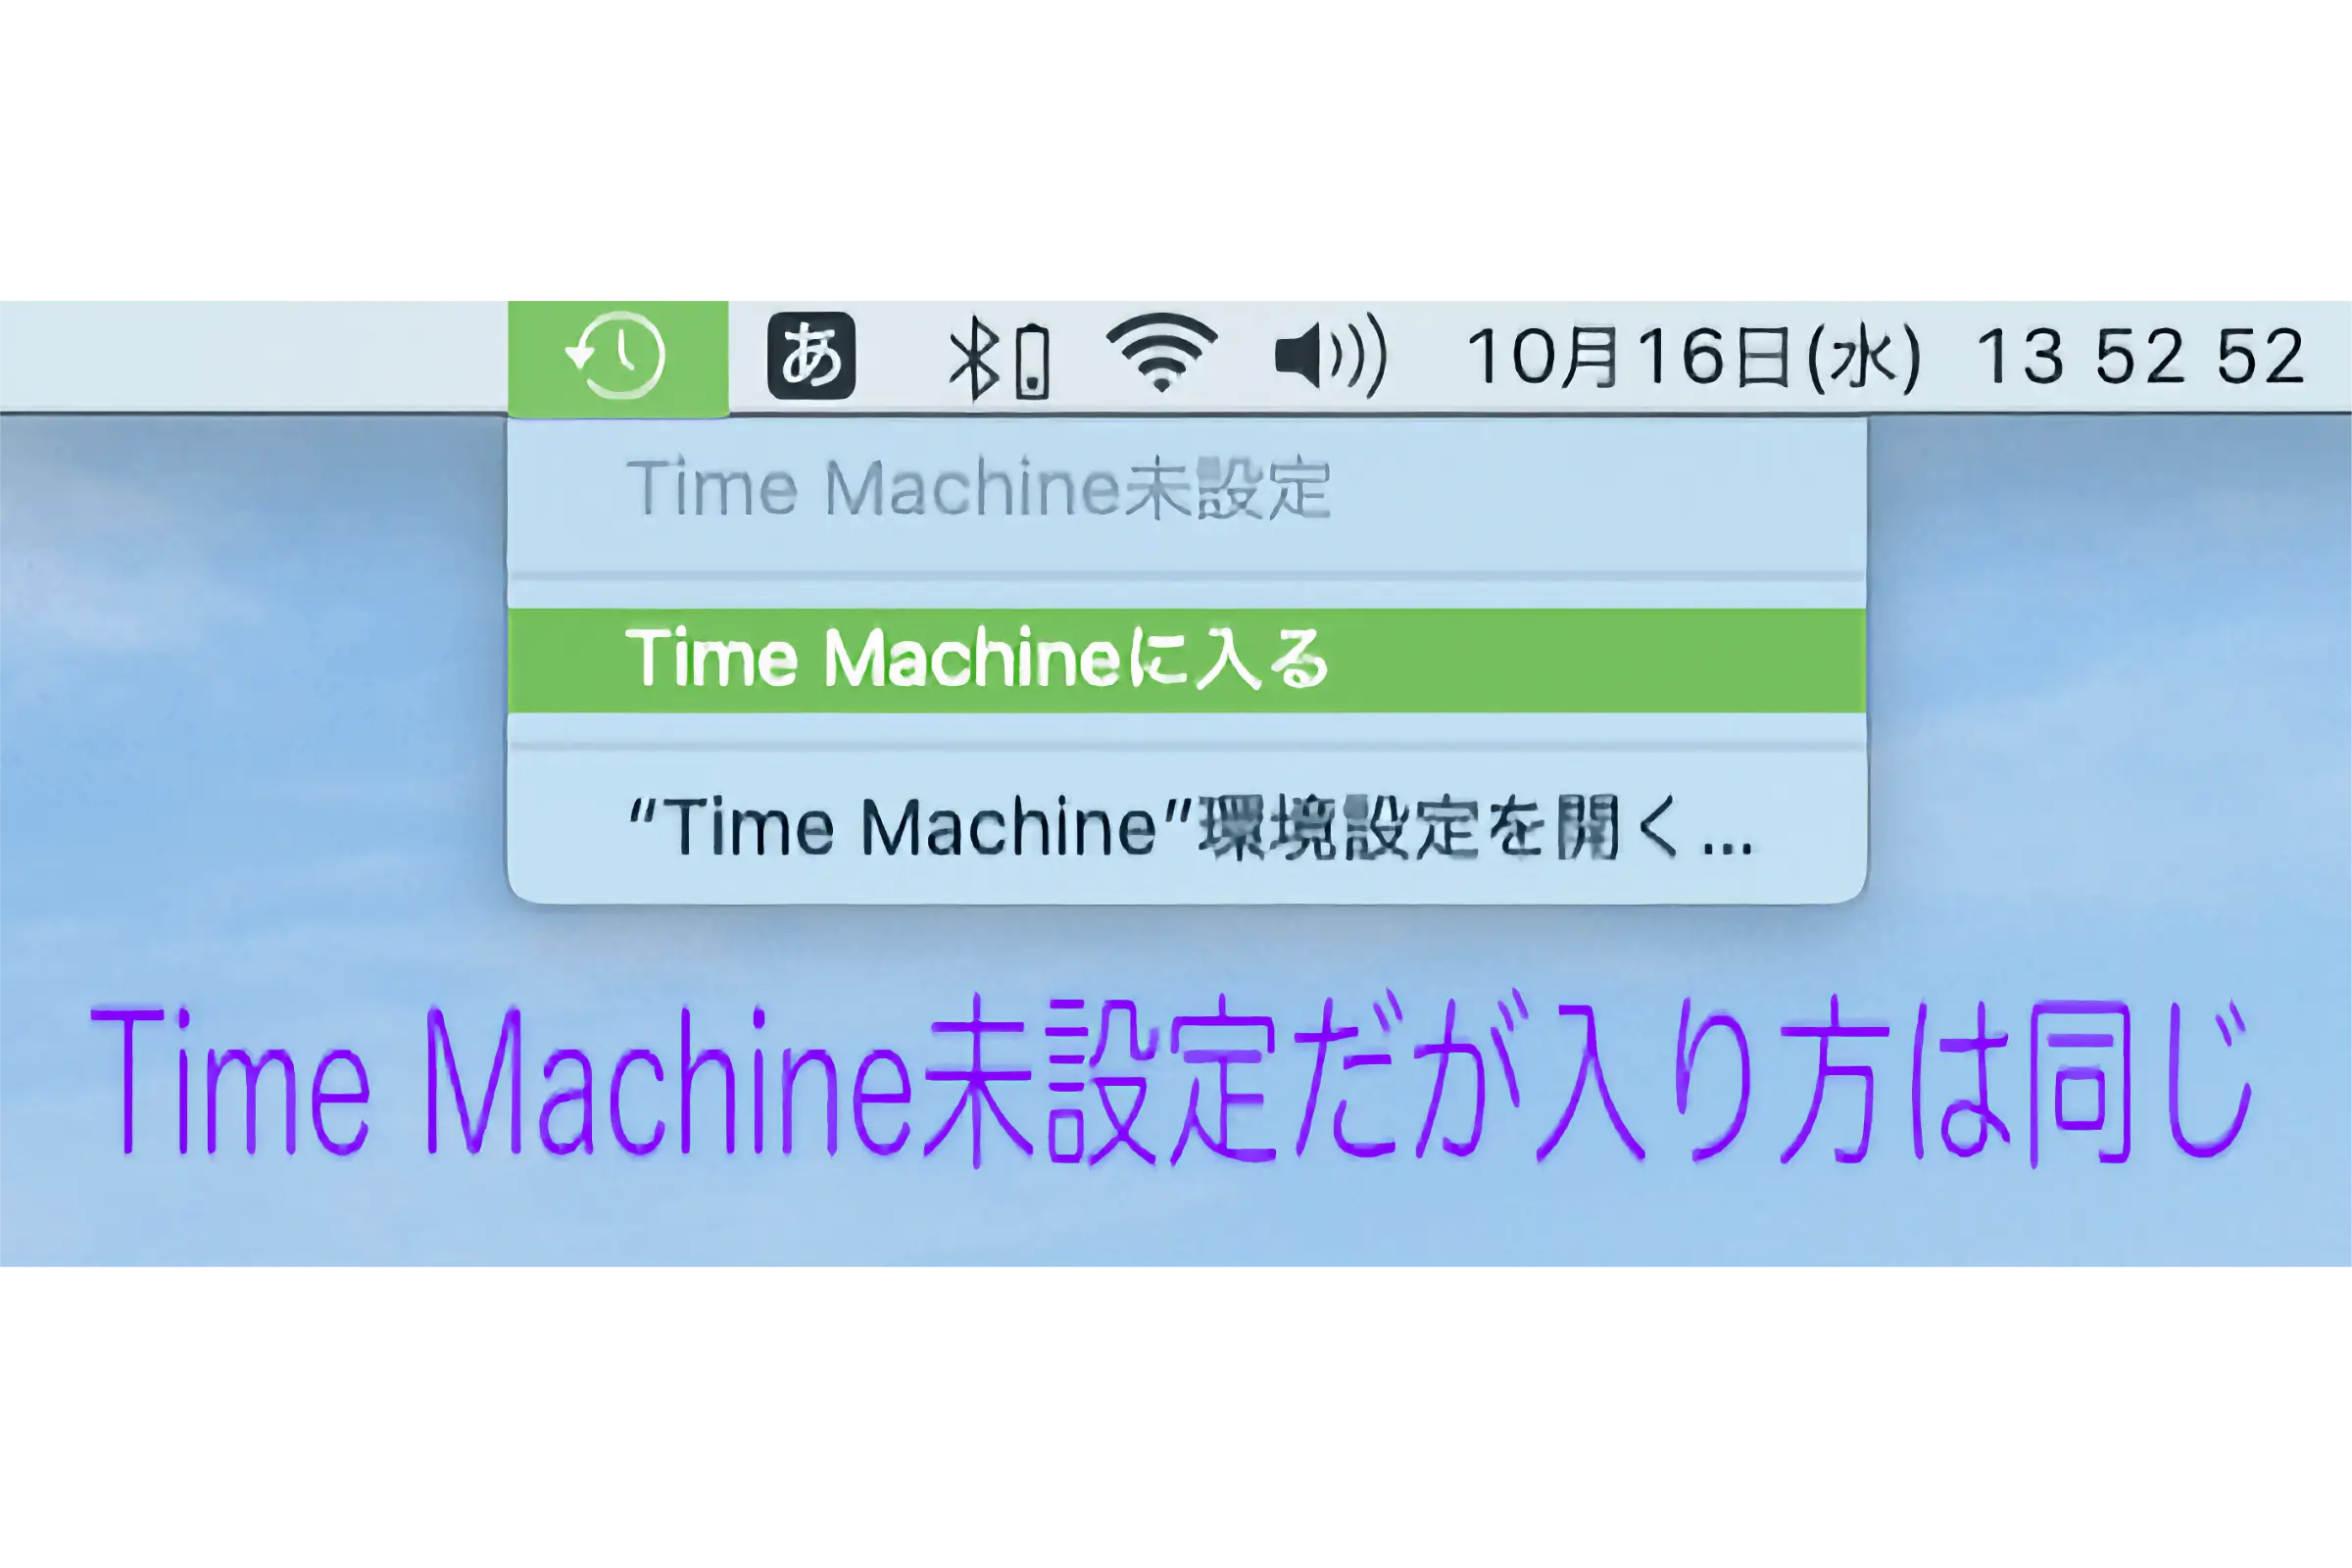
For Time Machine, click on the menu bar > Time Machine icon > 'Enter Time Machine'.
The folder selection order is Time Machine
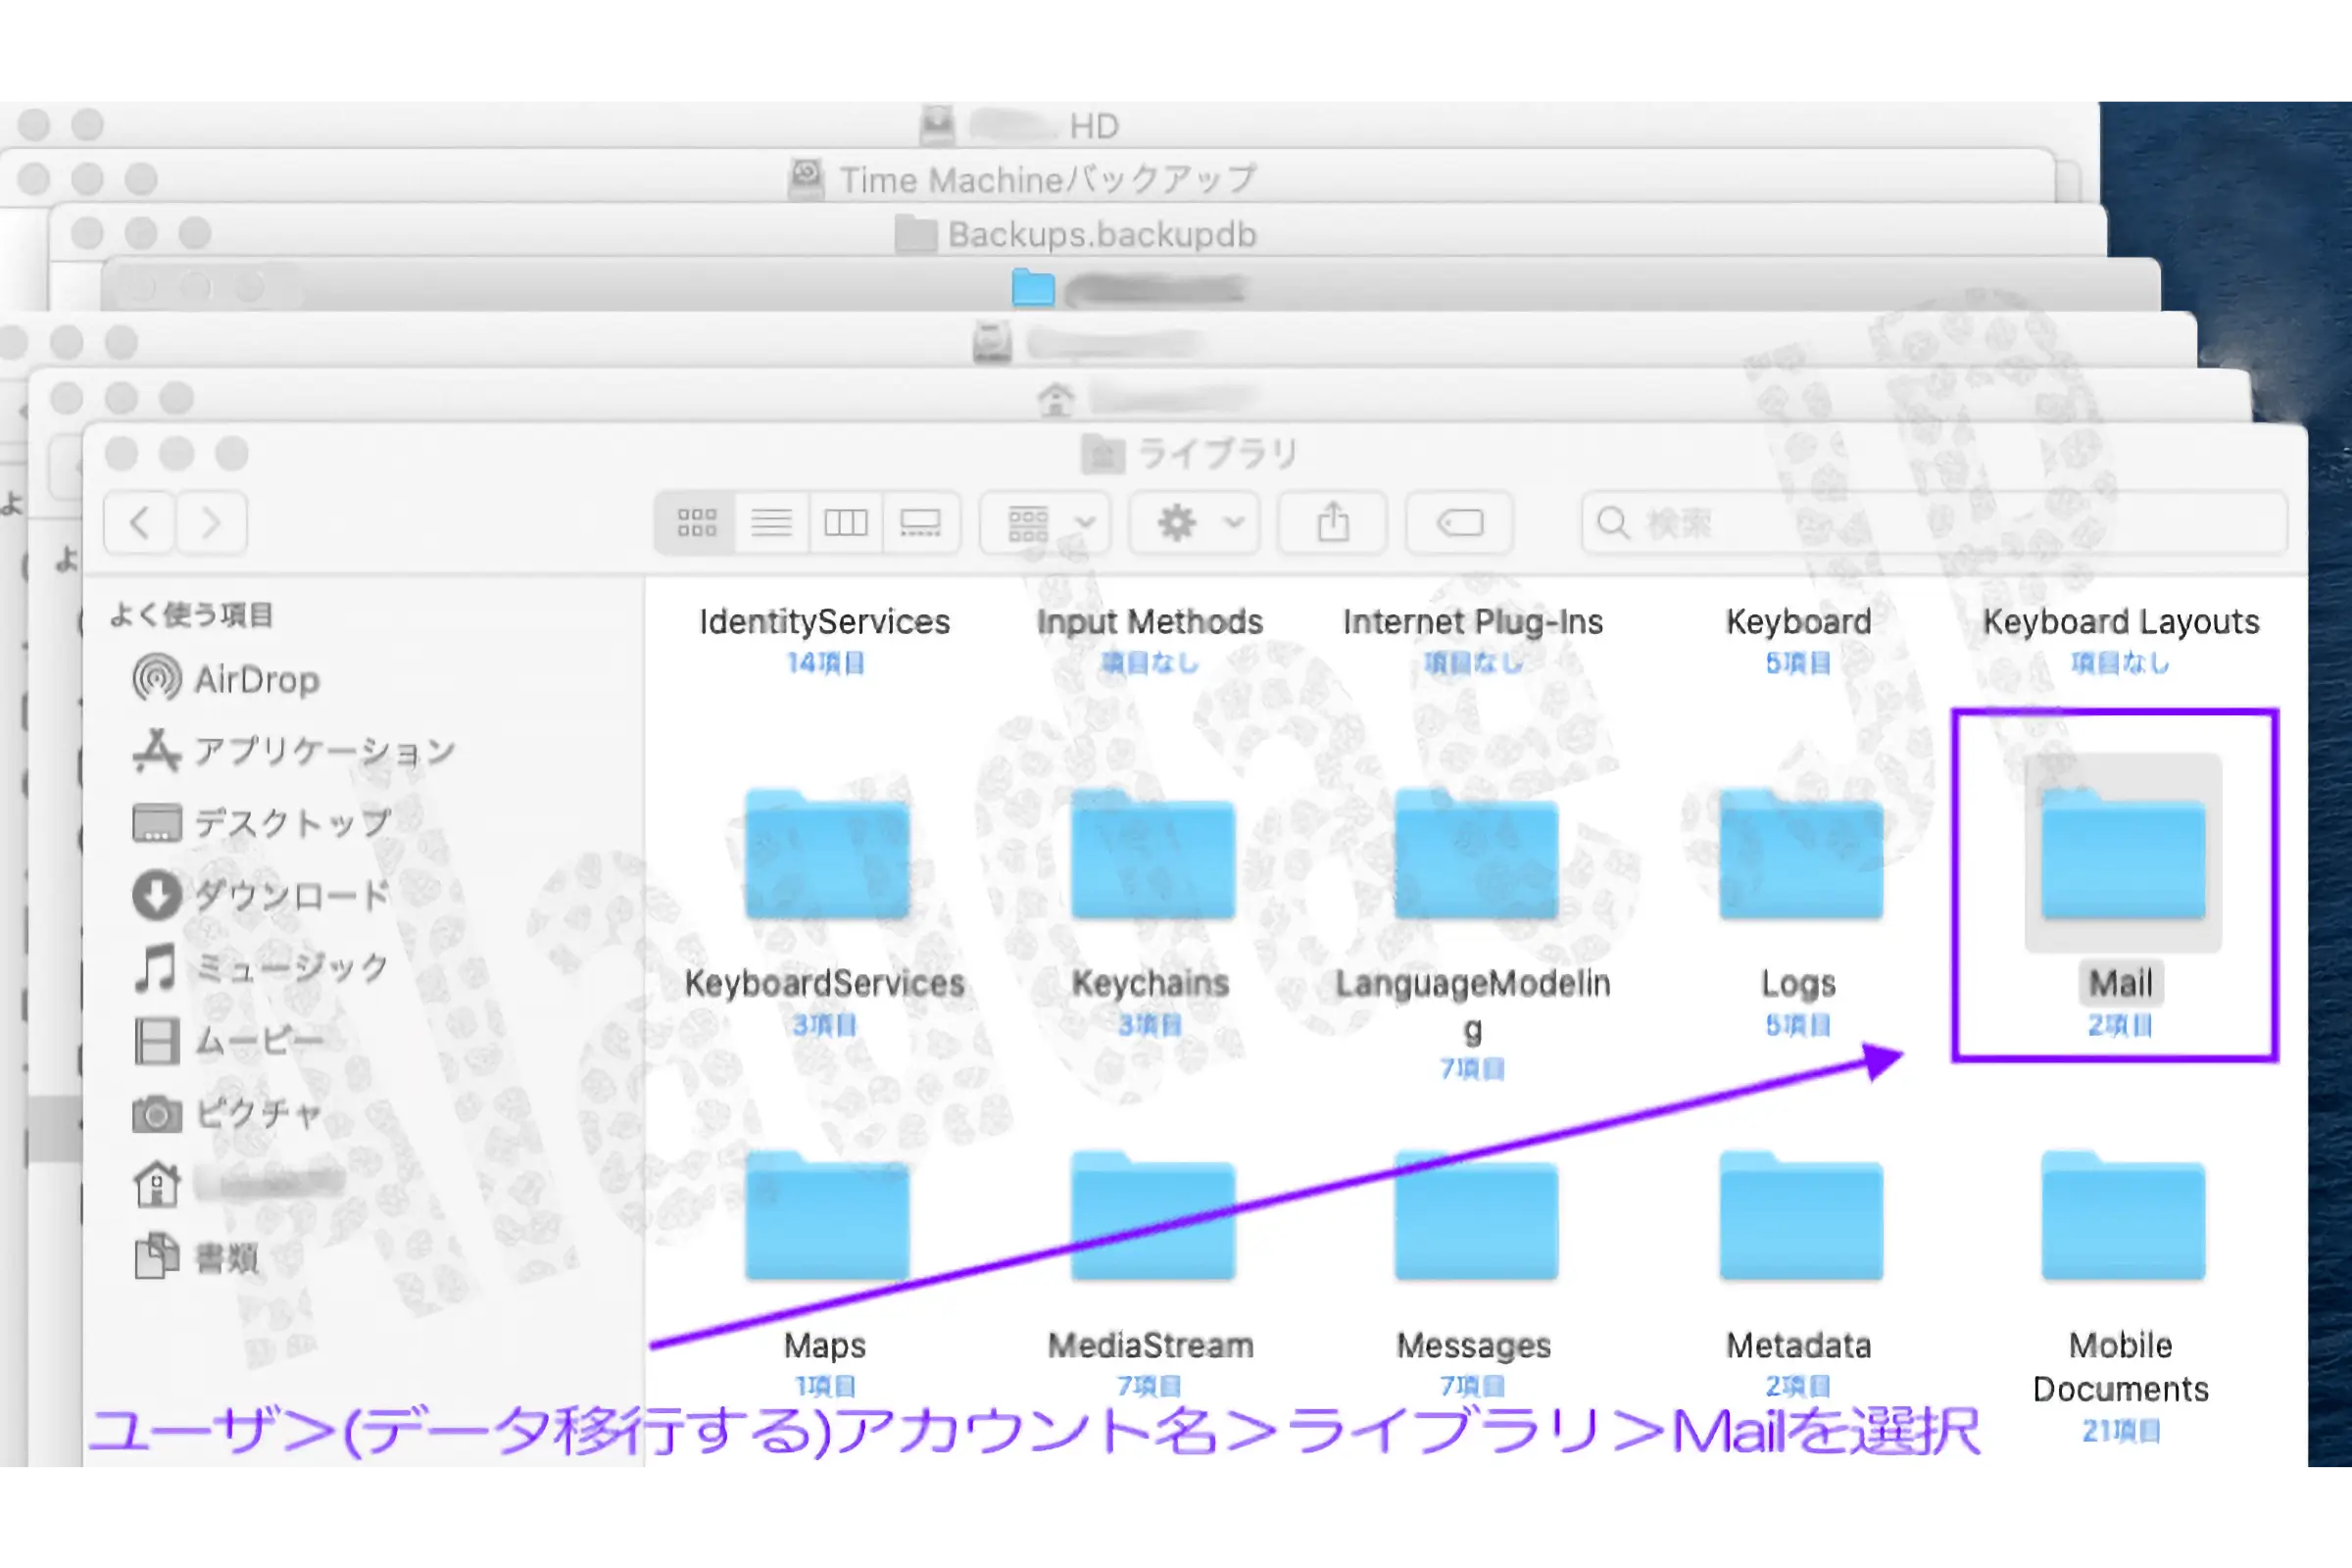
Time Machine Backup>Backups.backupdb>Computer name>User>Account name (to which you want to migrate data)>Library>Mail
If you want to use other backup methods, go to Other Backups > Computer Name > User > (Data Migration) Account Name > Library > Mail
and (Data Migration) Mail folder.
There are things to keep in mind that are often mistakenly selected, such as selecting System Folder>Library, or selecting another account name, so you have to experience it.
2. Paste the Mail folder you want to migrate in an easy-to-understand location
(Migrate data) Once you reach Account Name > Library > Mail, copy this Mail folder.
*It is possible to restore directly with Time Machine, but since our purpose is data migration, we will not use the restore function.
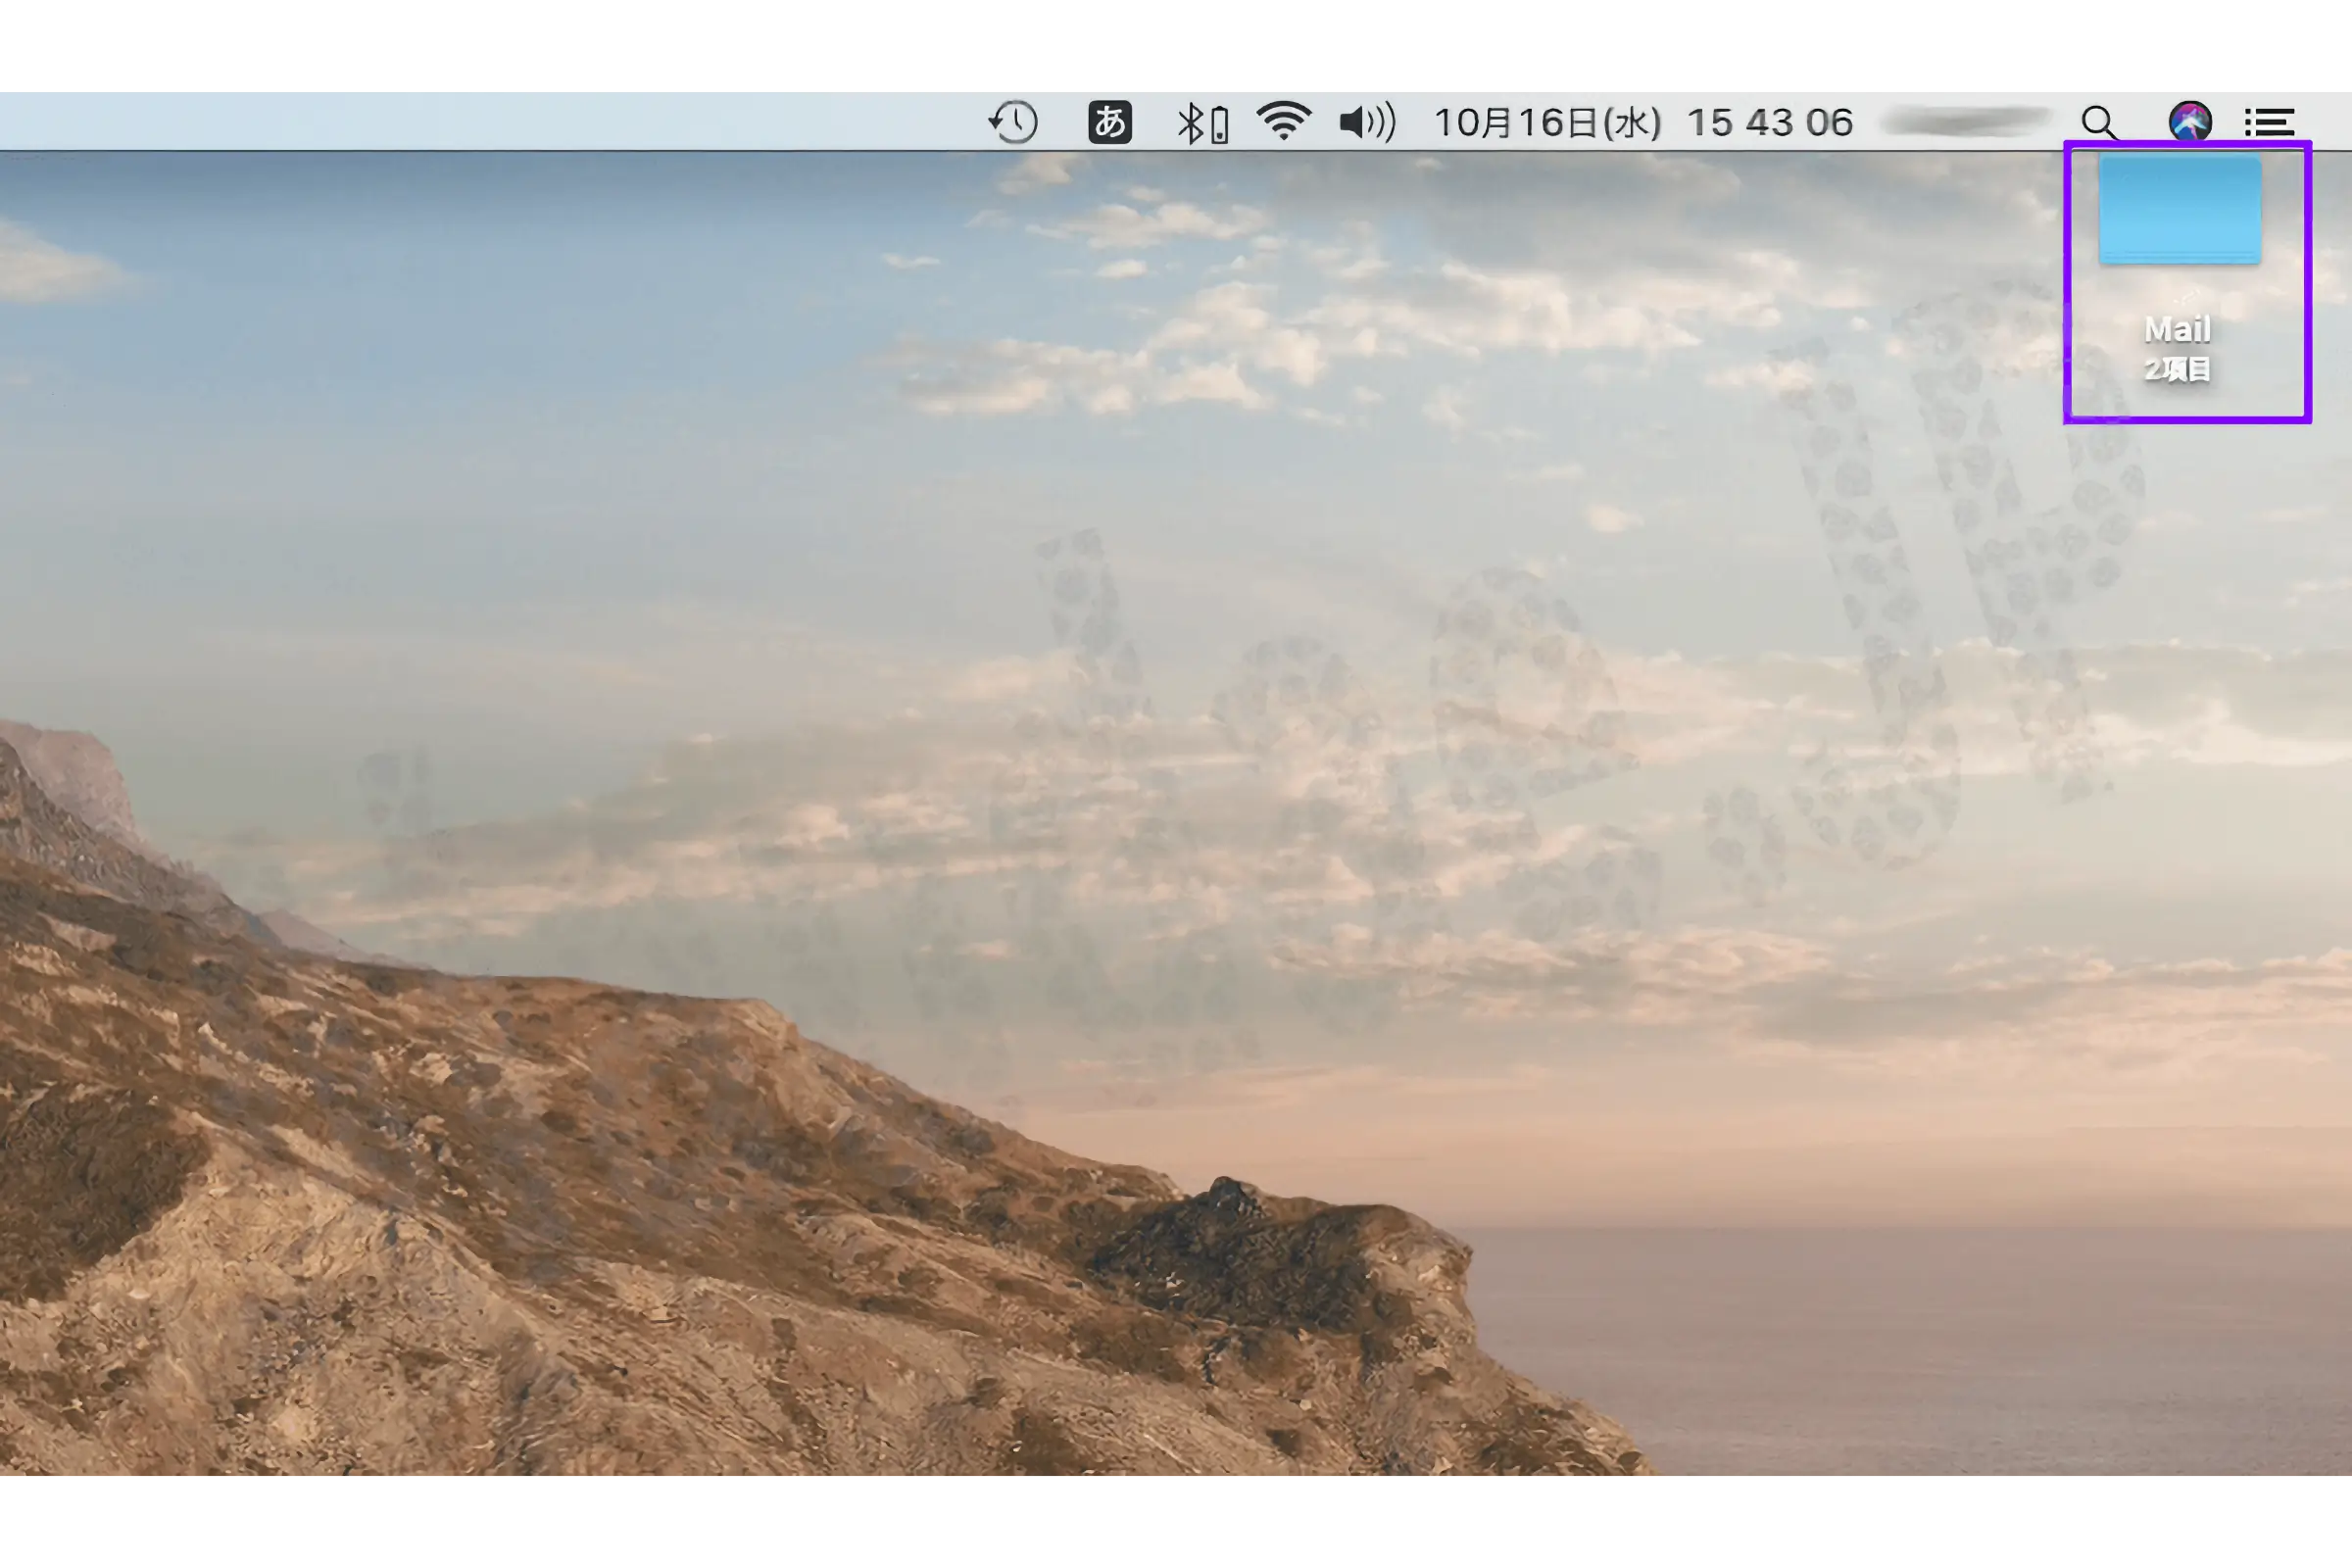
Paste the copied Mail folder somewhere you can find it.
I always choose to paste it on my desktop.
Now you are ready to migrate your mail data.
3. Launch your email app and load your mailbox...
Based on my experience, I assume that the email app will not function unless you set at least one email address, or a loading guide will appear asking 'Which email do you want to migrate?', but in this case, proceed after setting the email address. (I think it would be easier to sort the migrated data that way.)
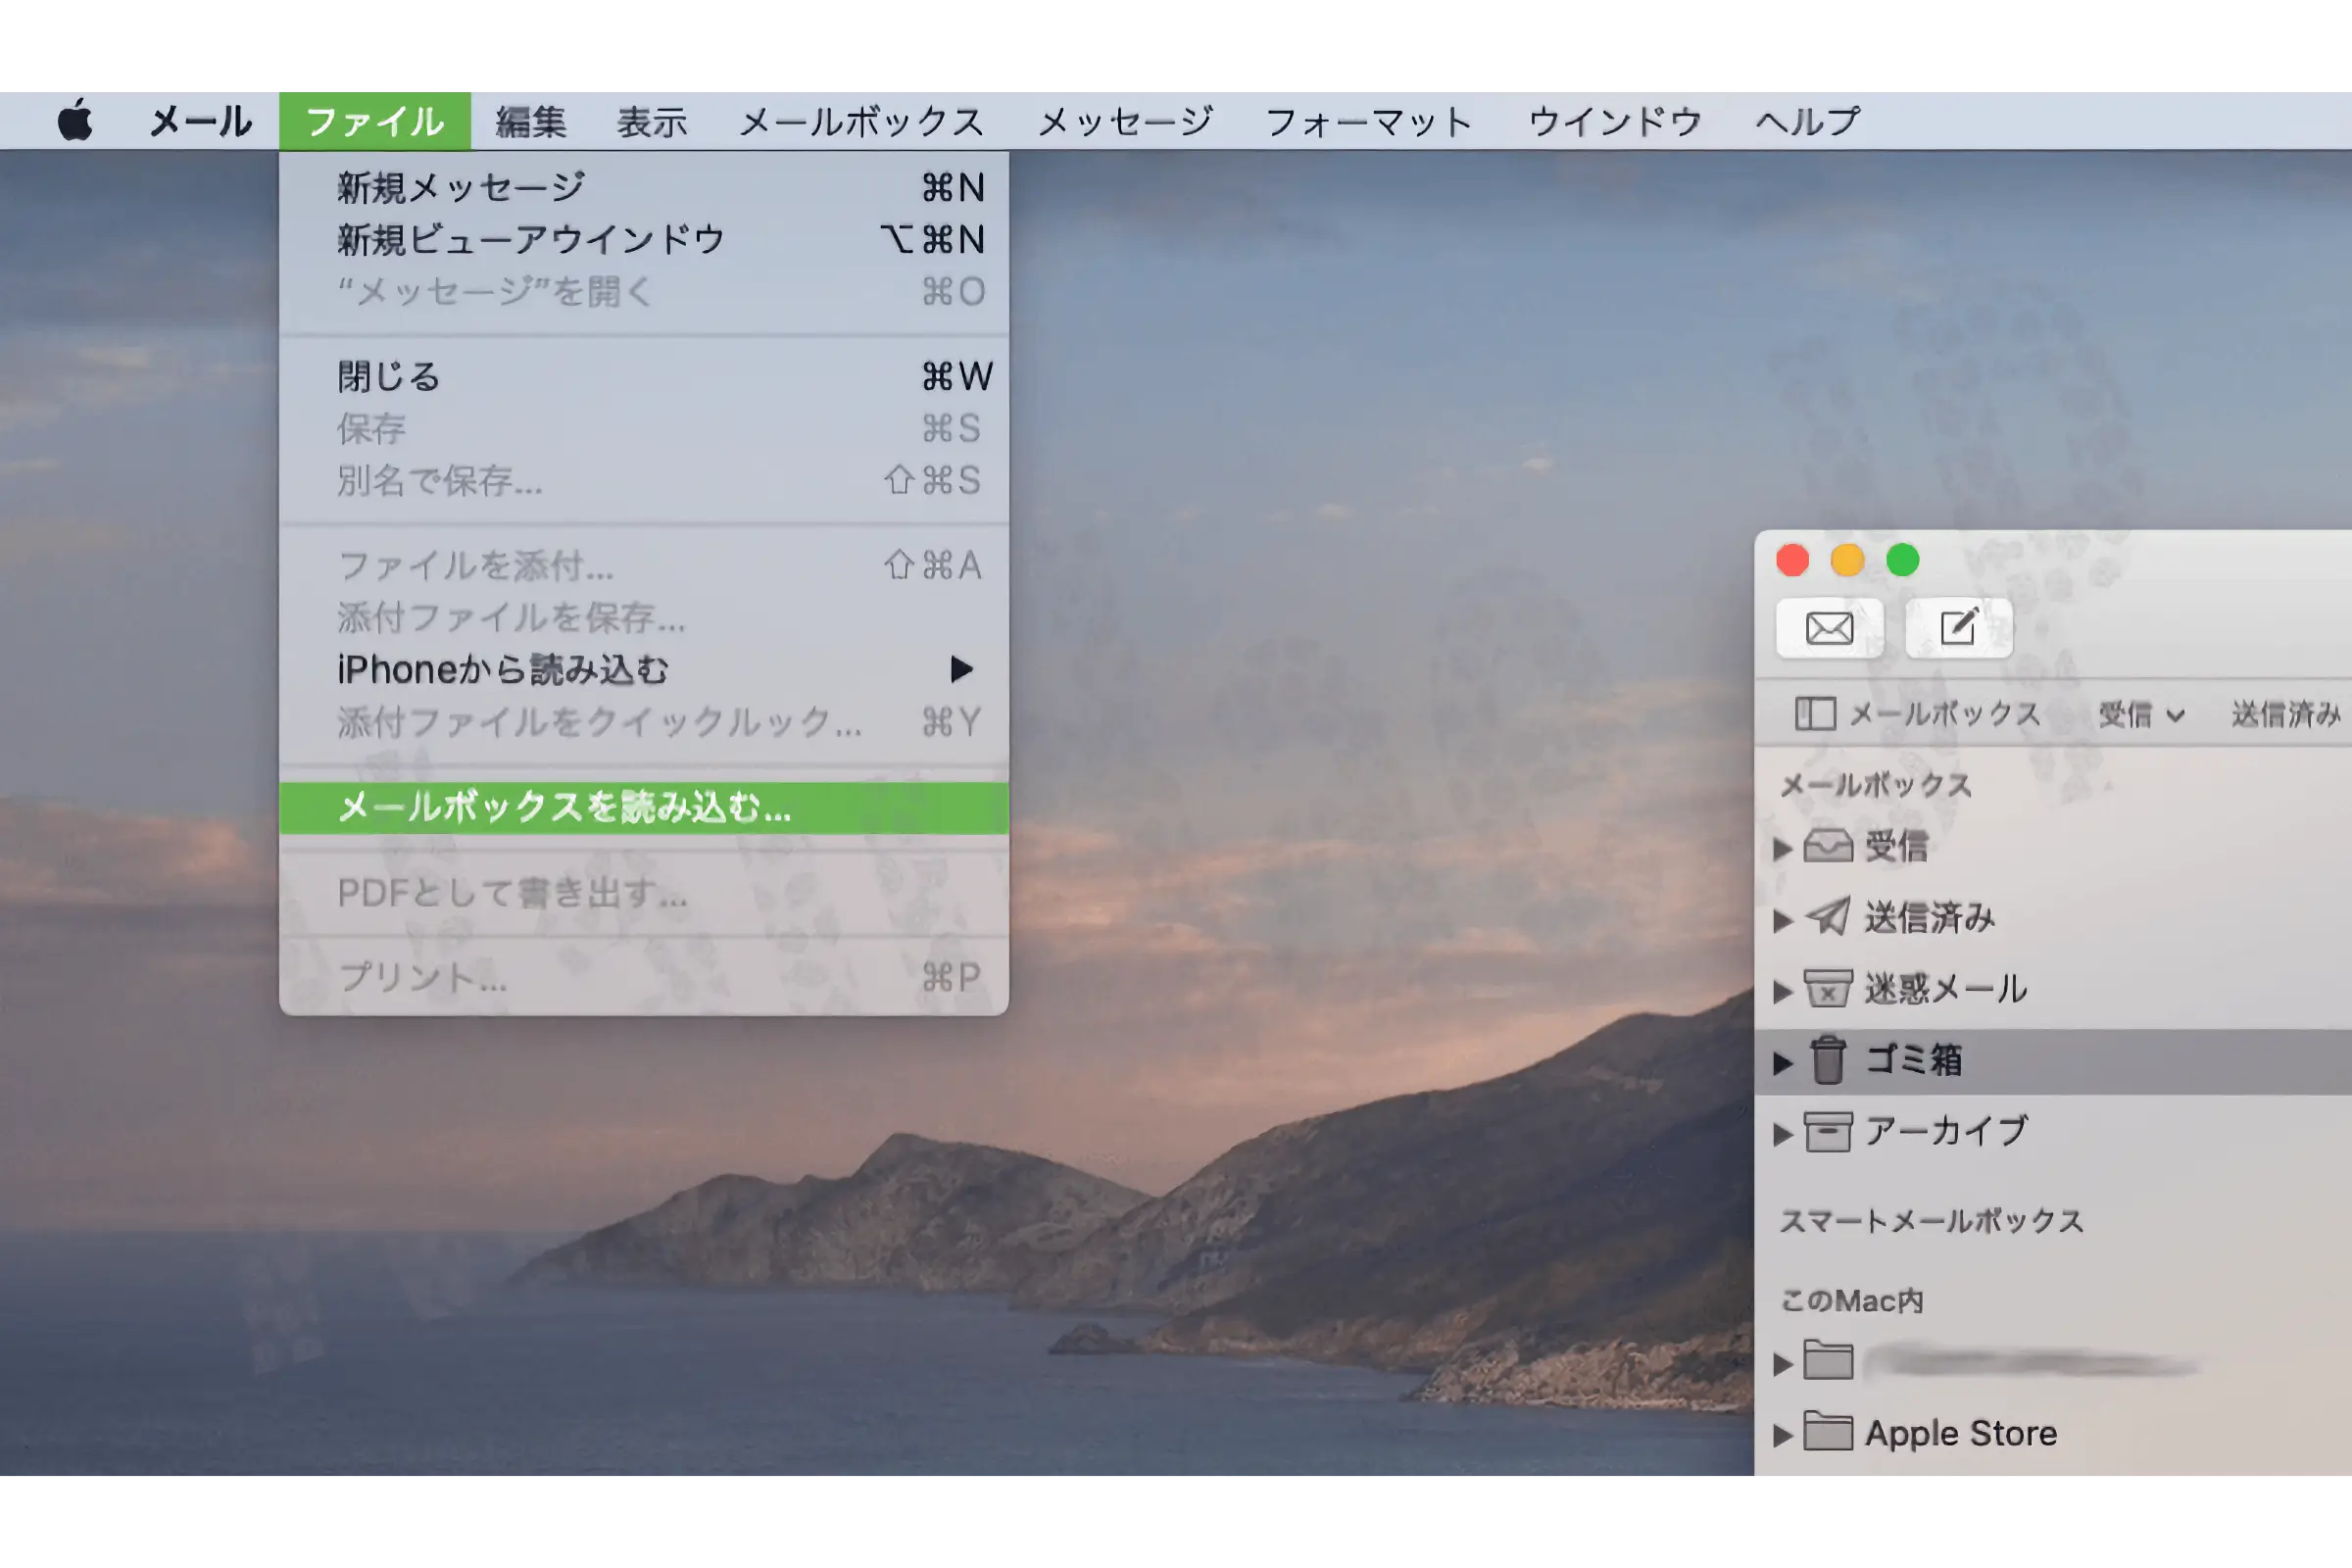
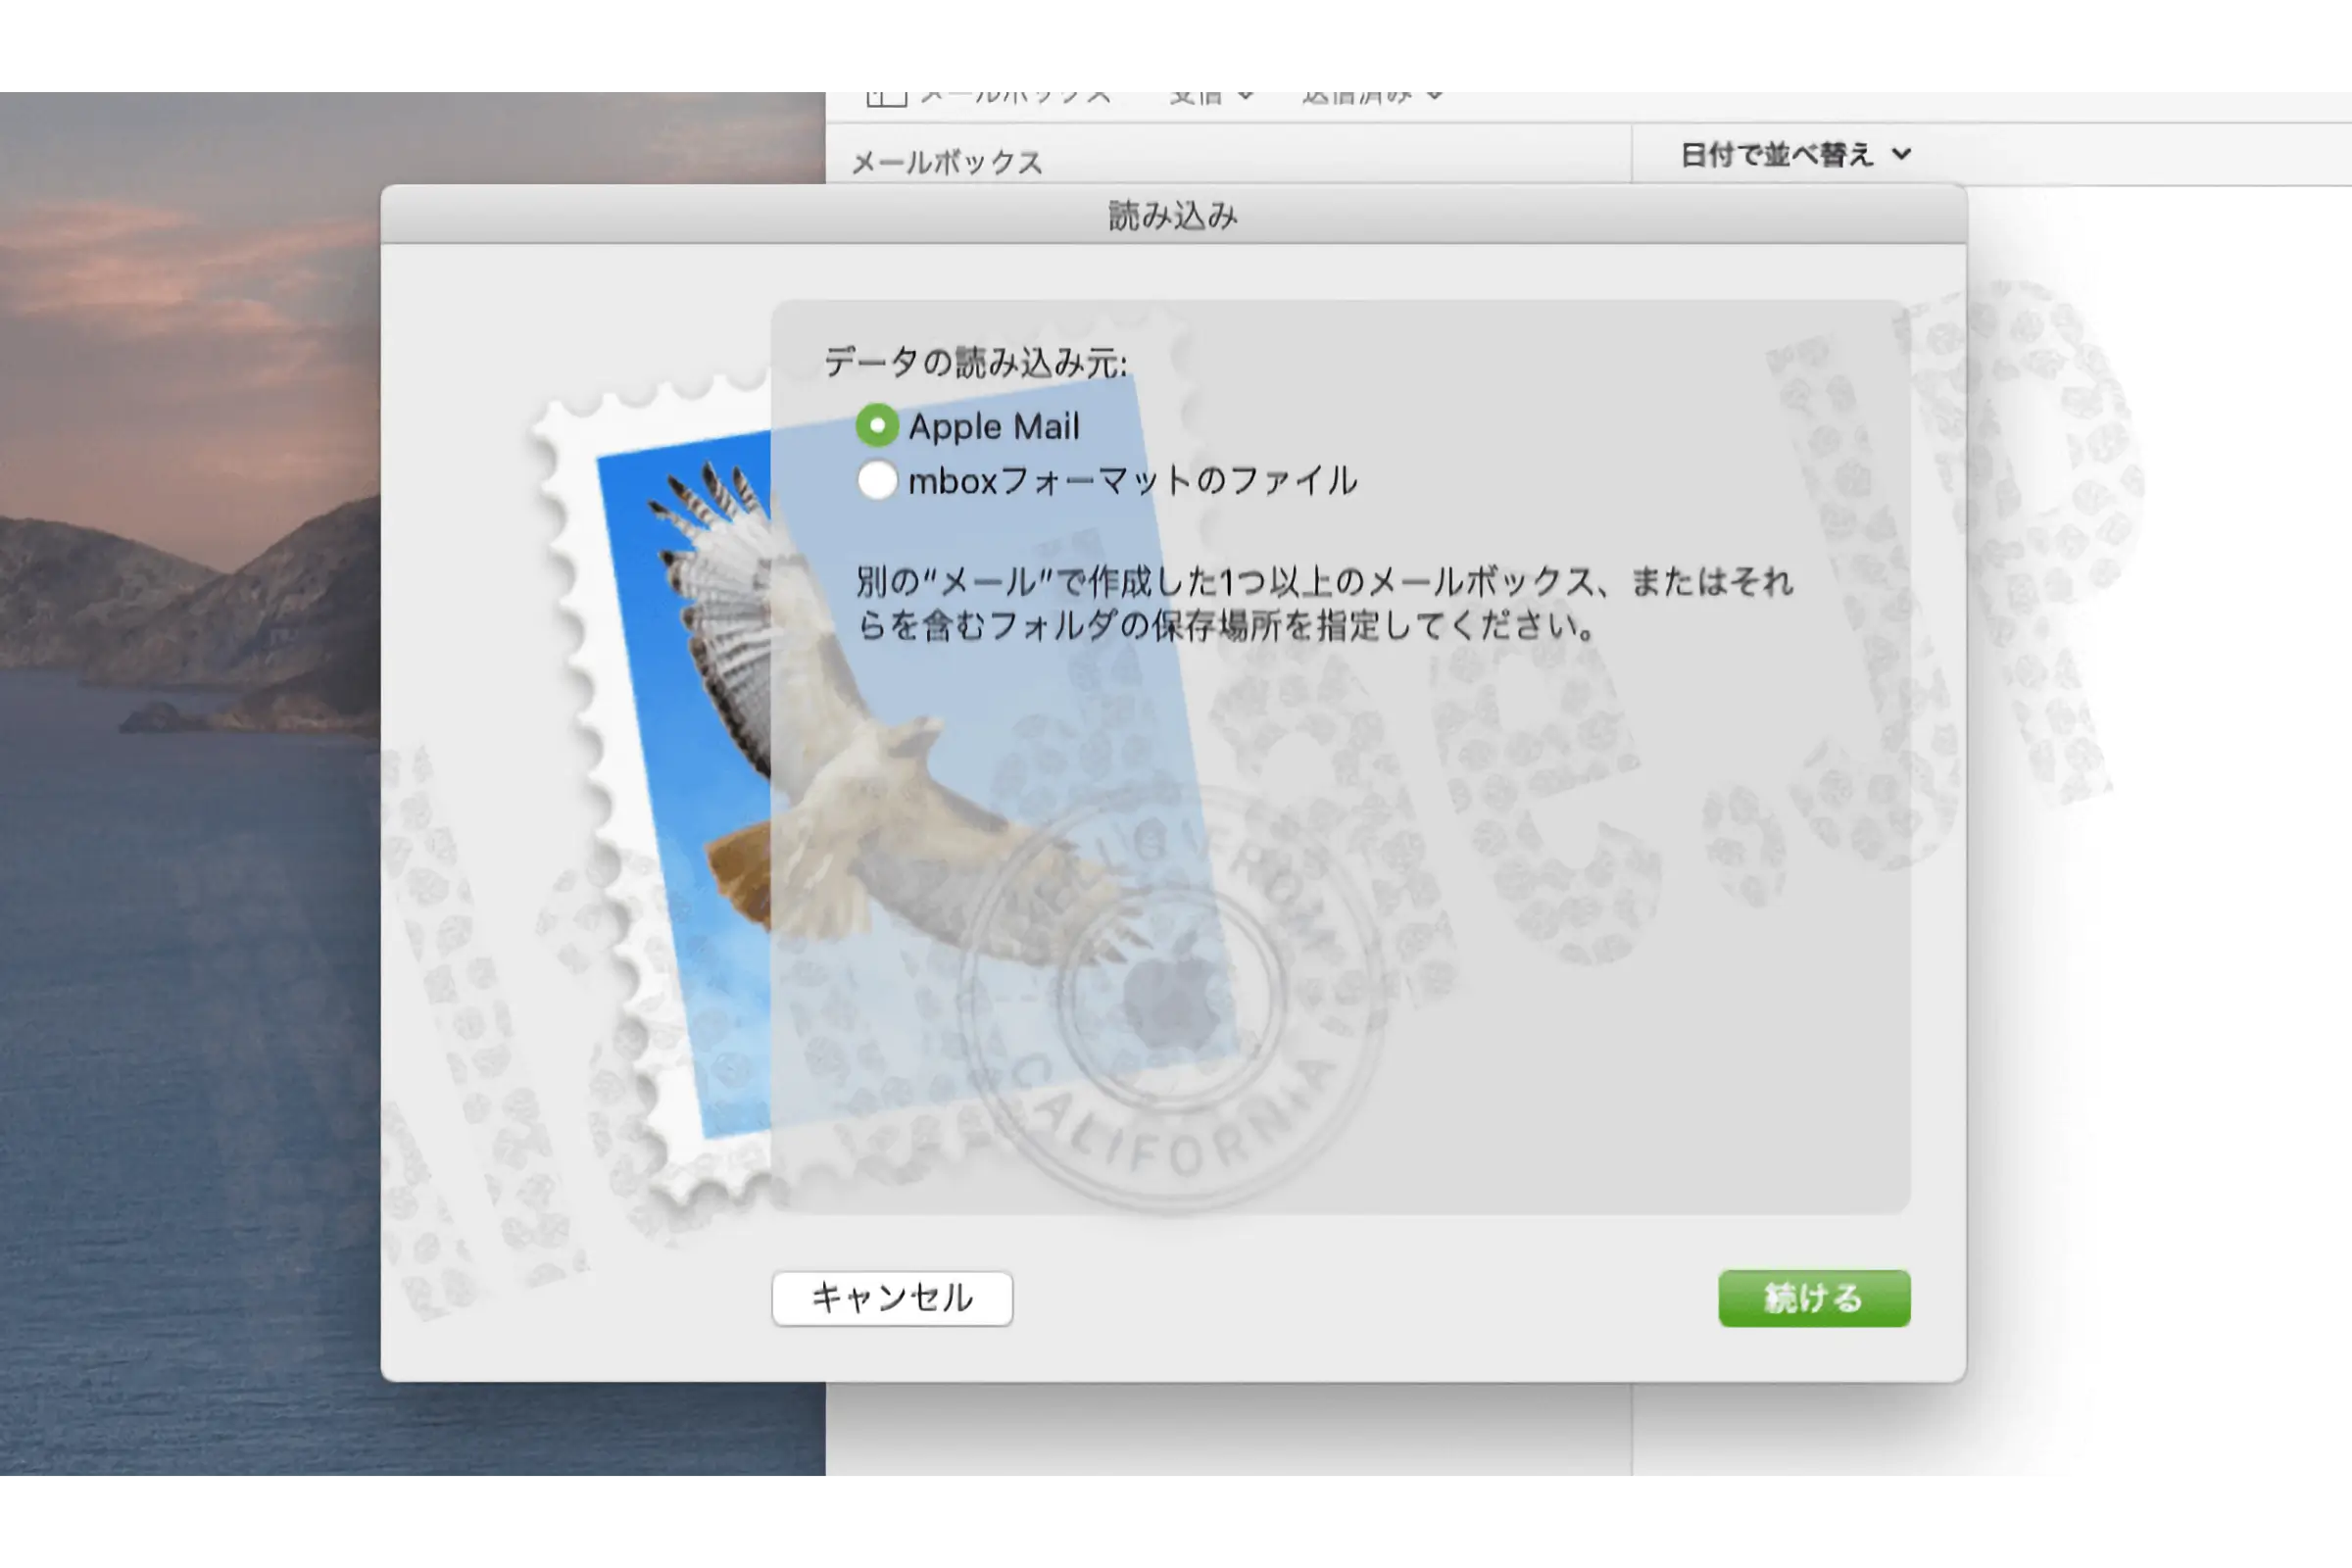
When you launch your email app, select File > Load Mailbox... from the top menu bar.
Just select Data Import Source > Apple Mail and click "Continue".
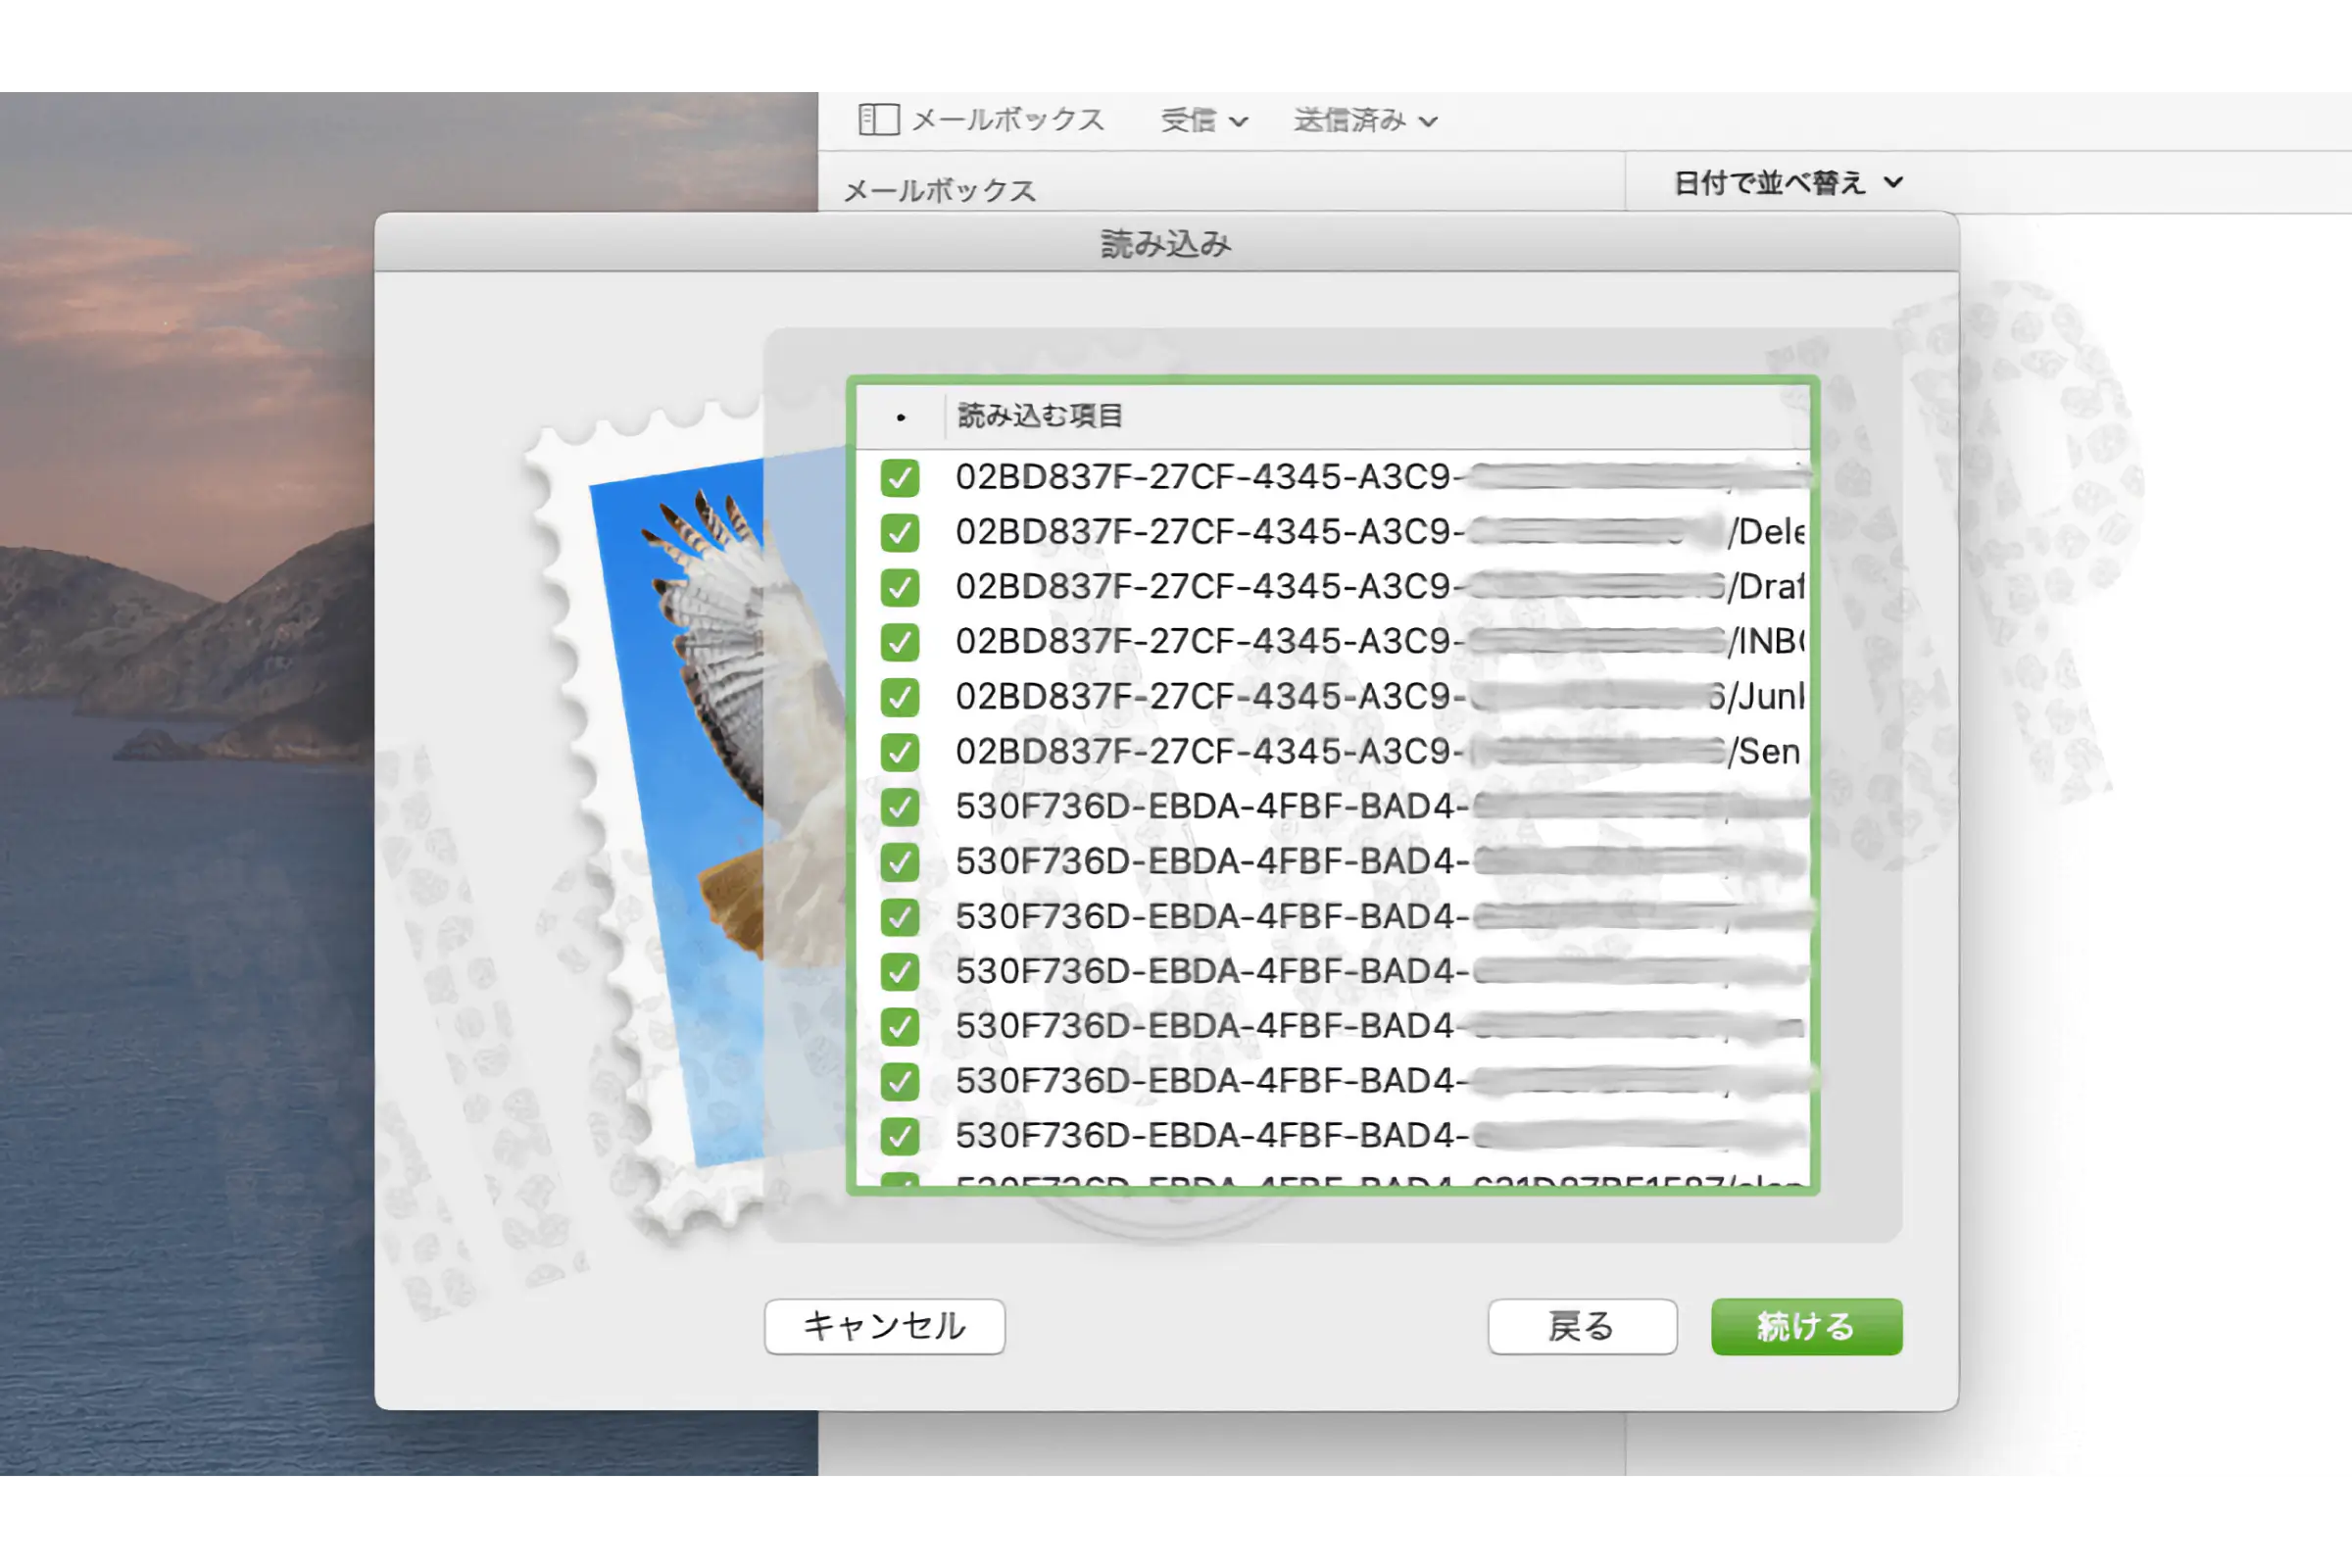
The items to be loaded will be displayed. If you understand folders, you can select them here, but you can organize them later, so it's better to click "Continue" without doing anything.
Wait for a while until it loads...
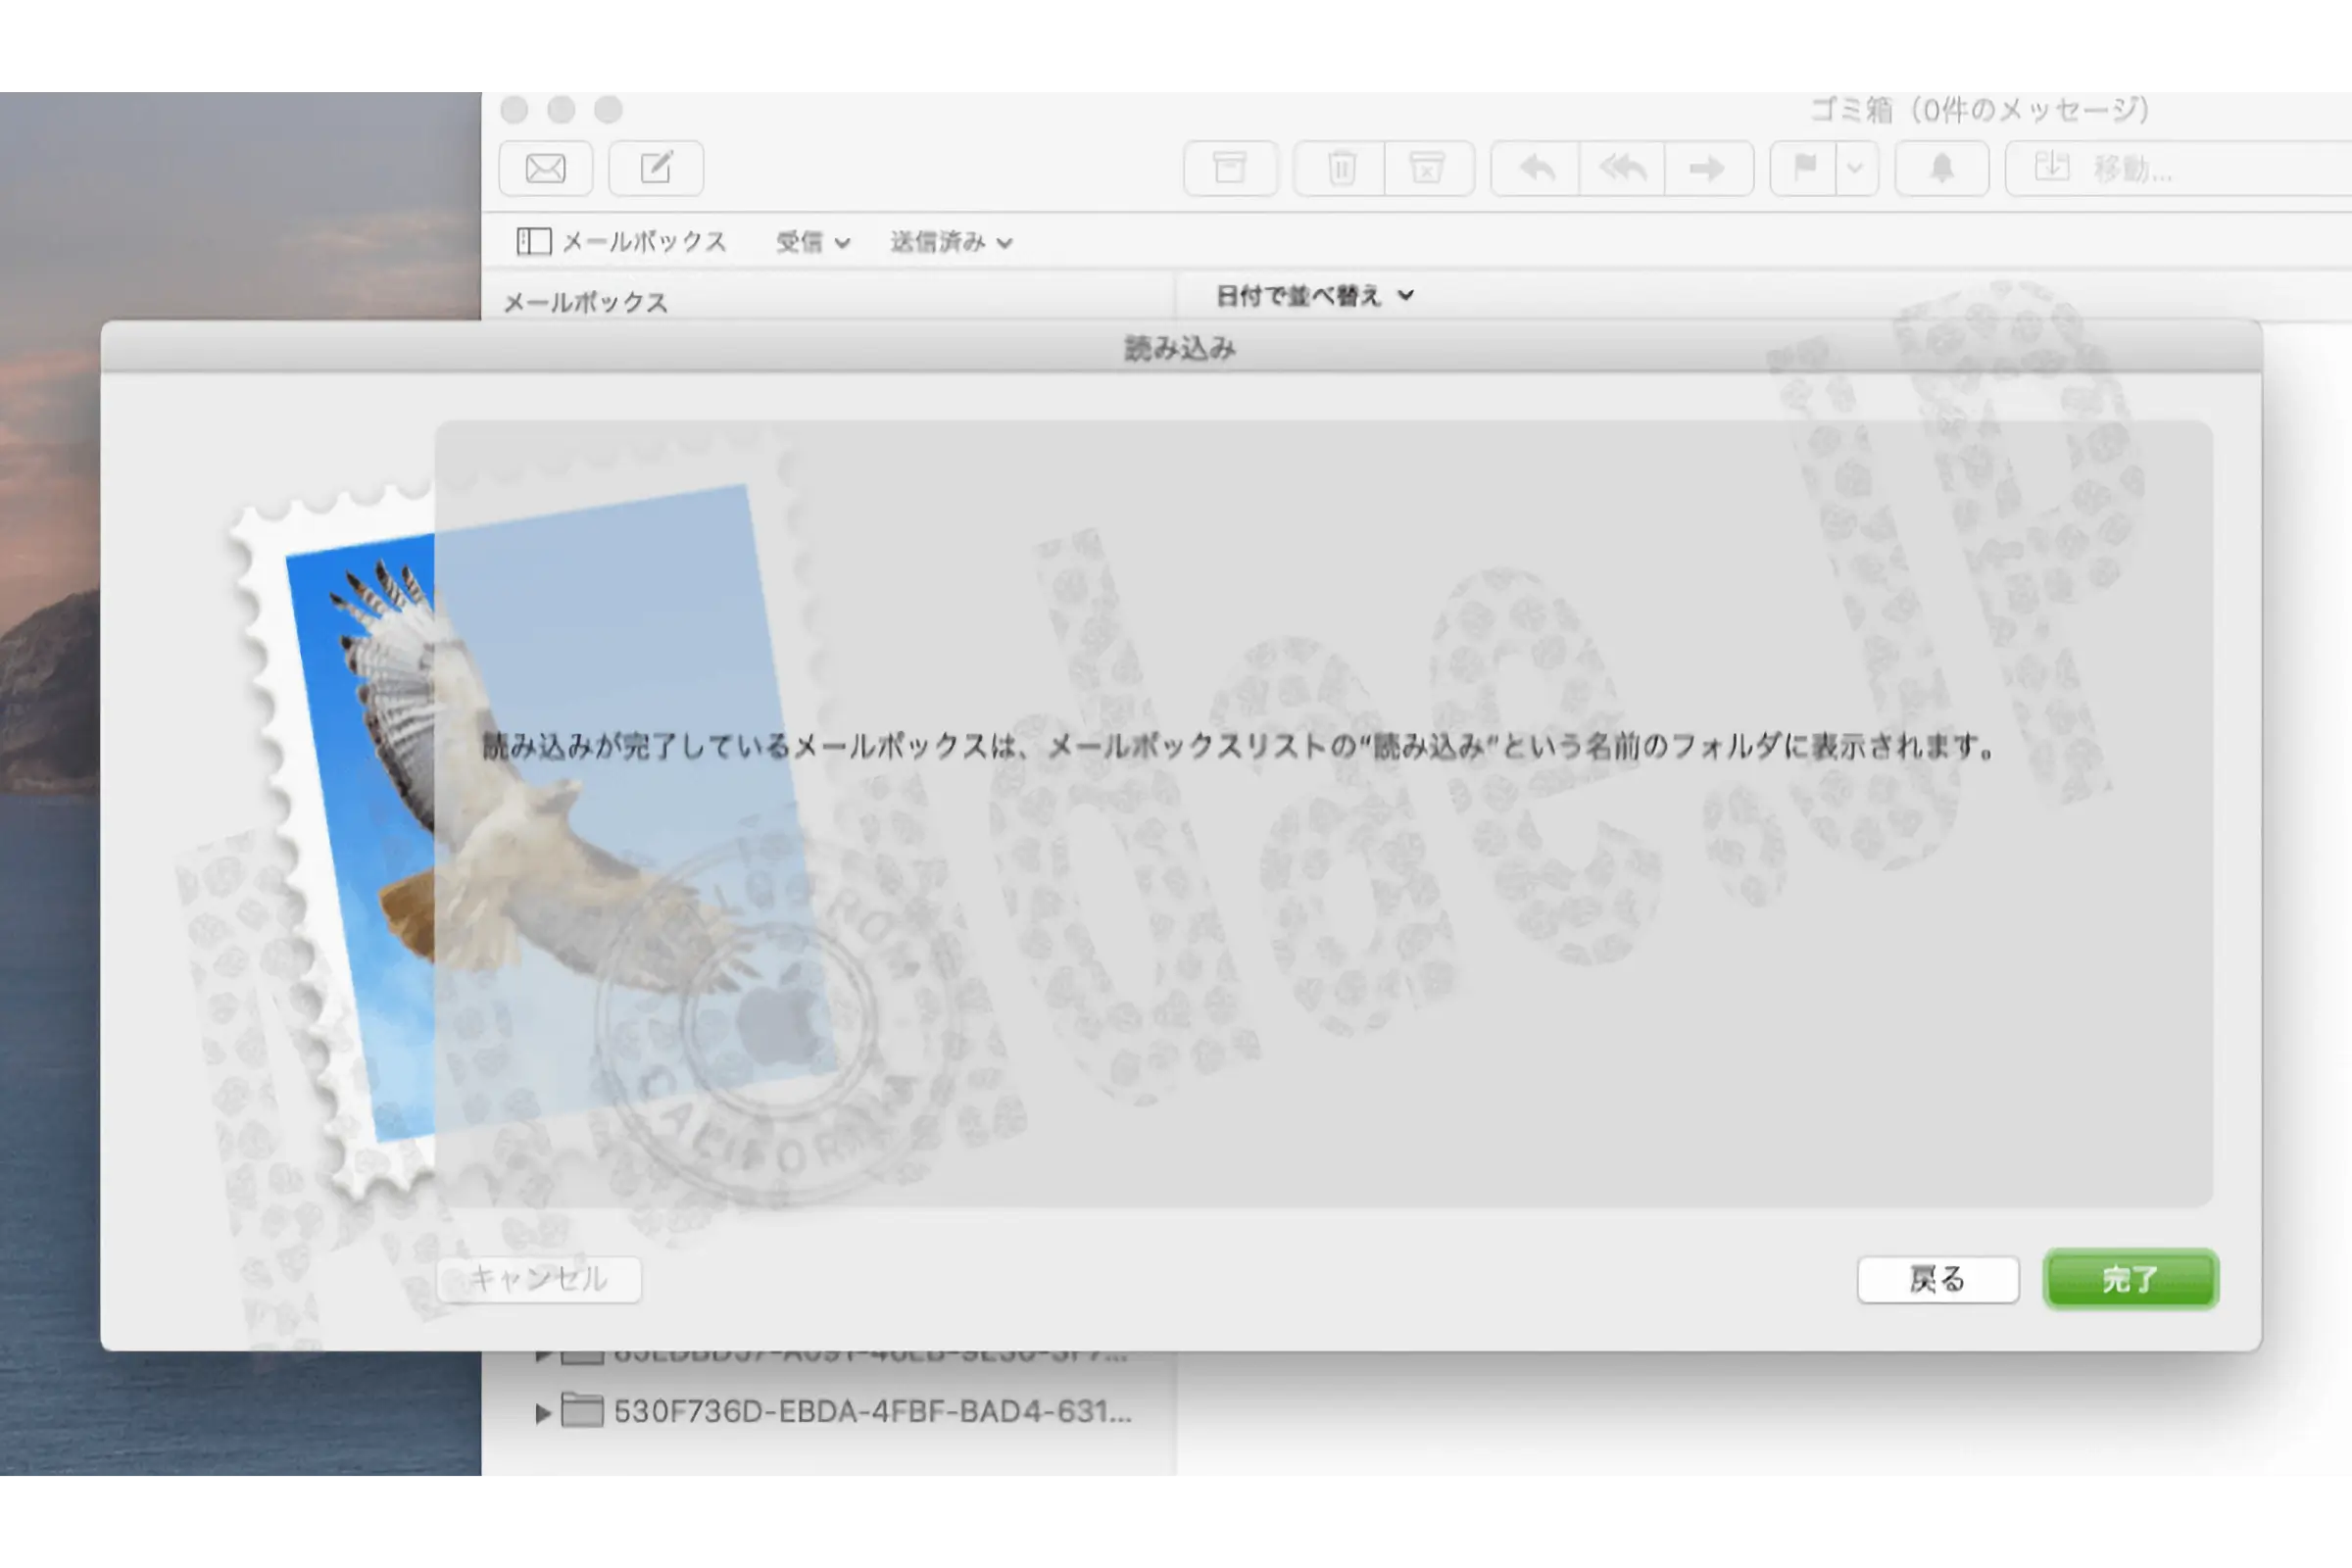
When you see the message 'Mailboxes that have been imported will be displayed in a folder named "Import" in the mailbox list, click "Finish"'.
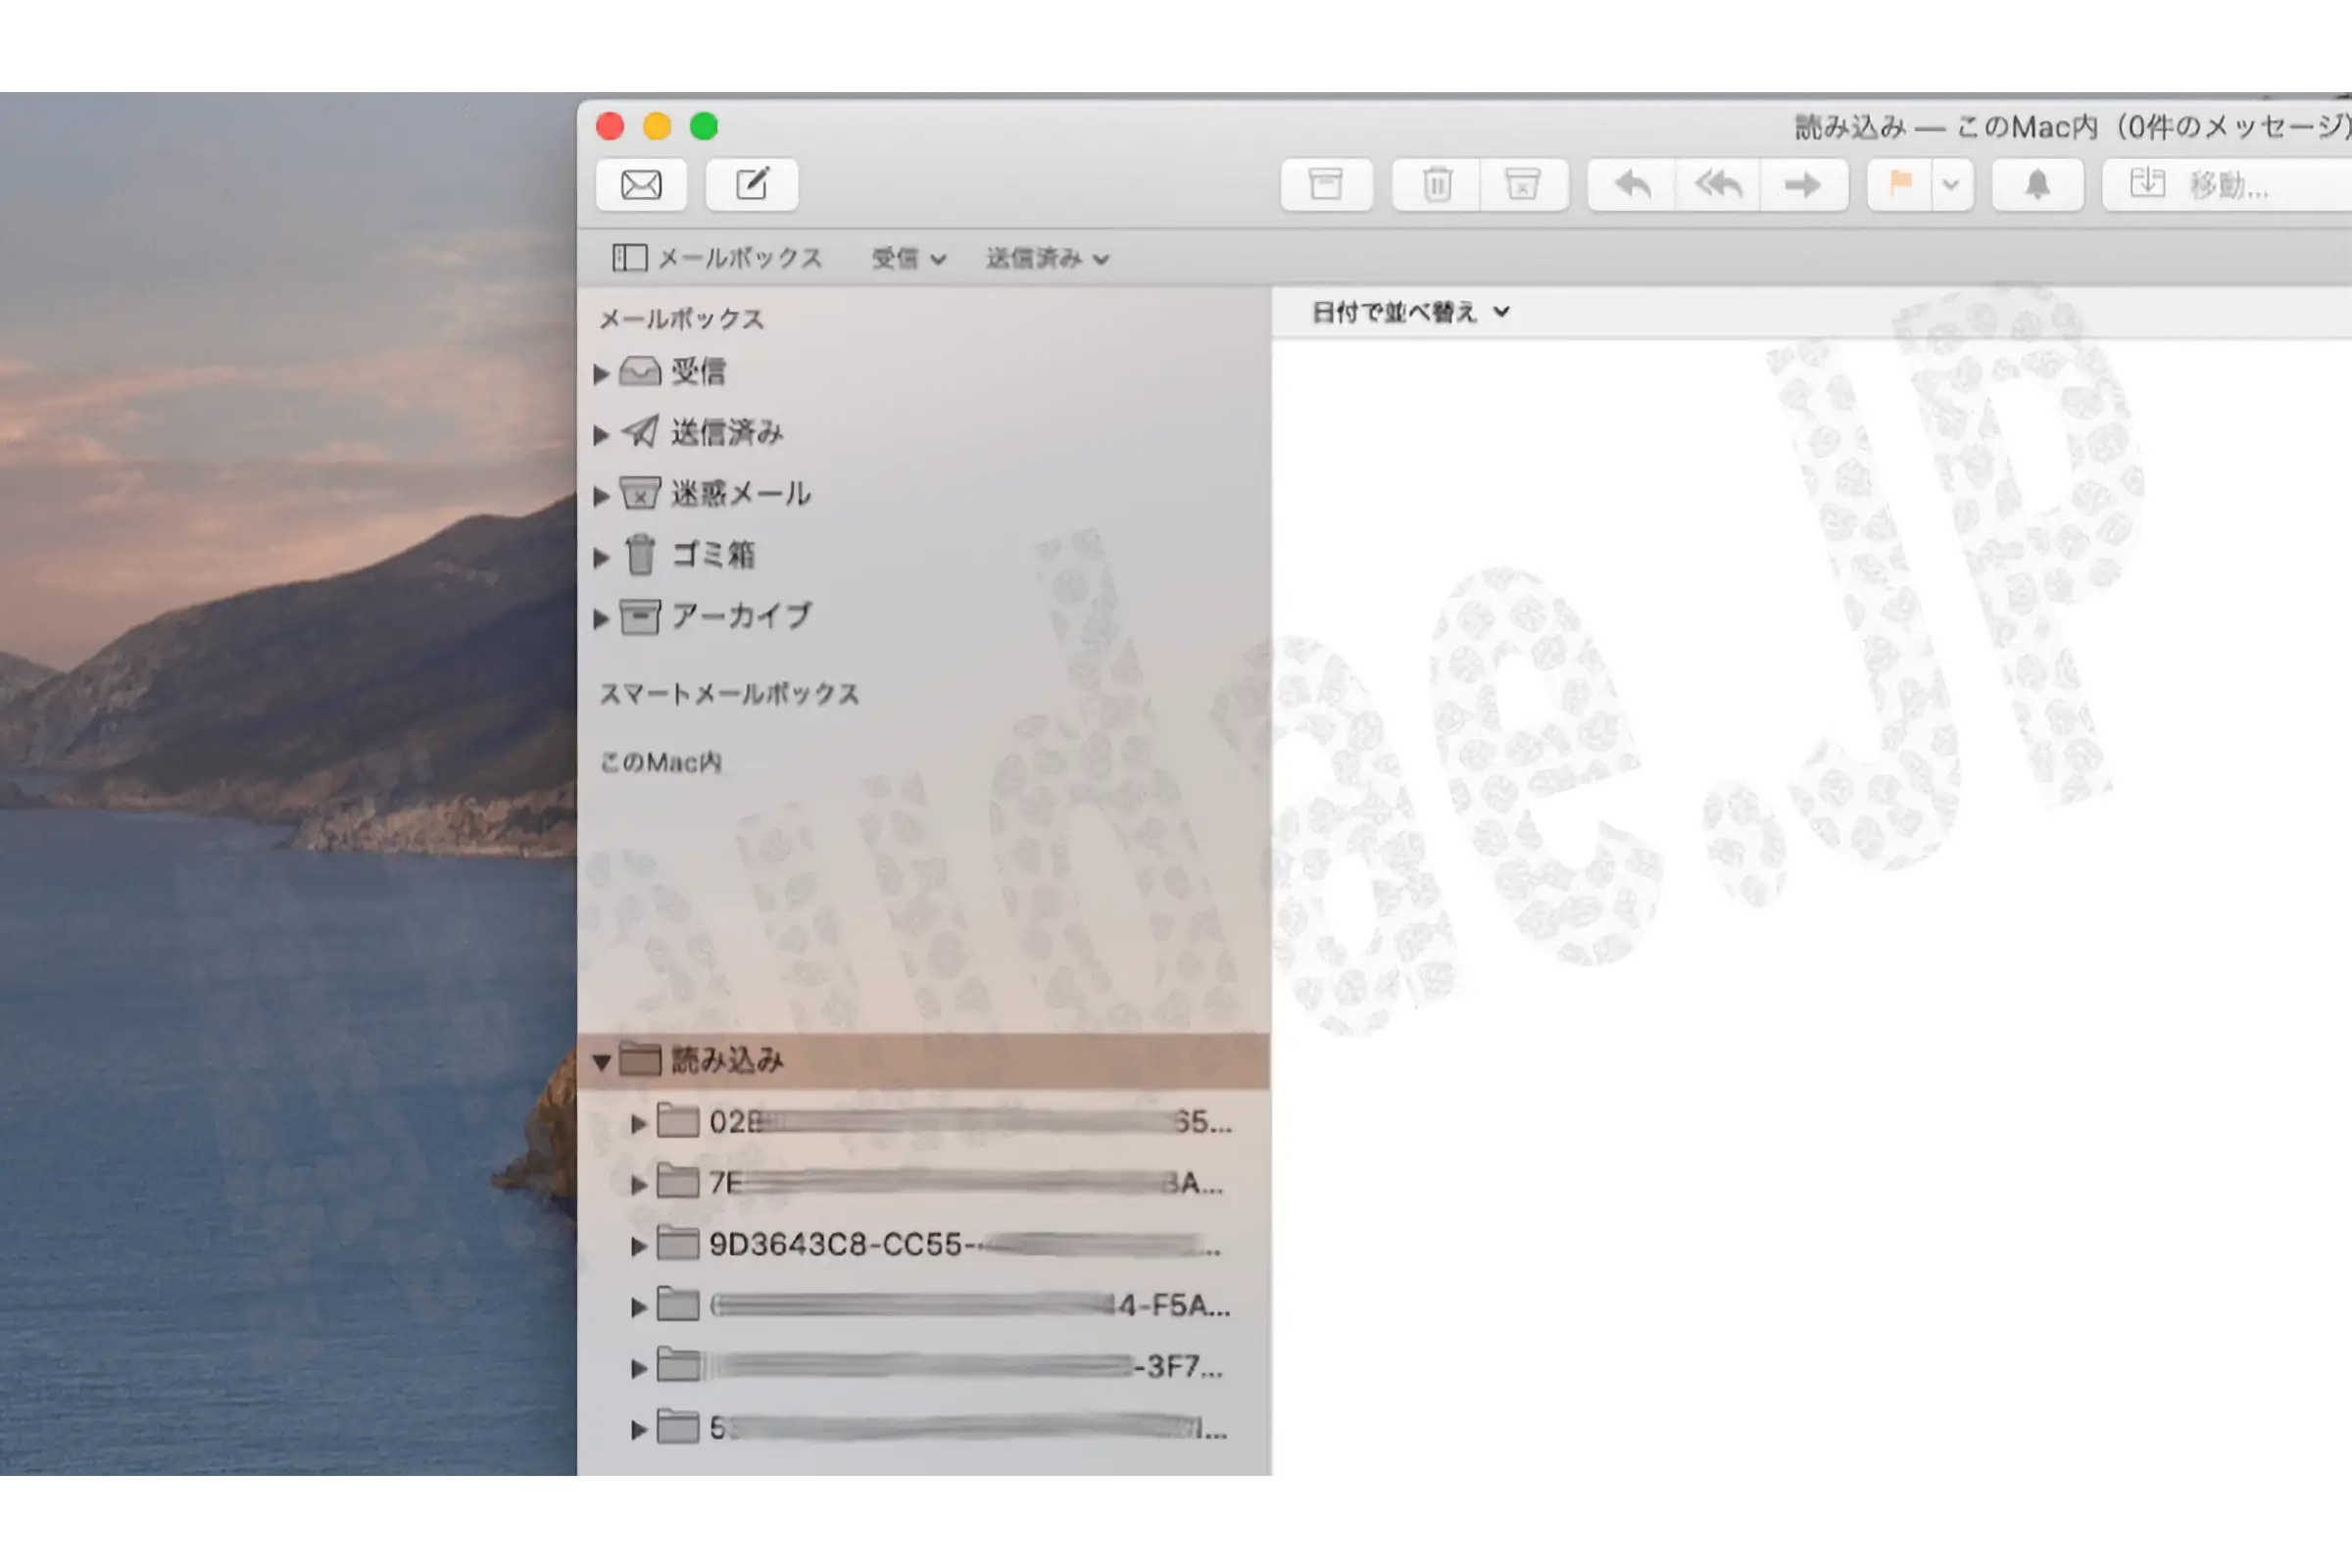
There is an "Import" folder in "On This Mac" in your mailbox, so all you have to do is organize it yourself.(For me, there are fewer folders than before, making it easier to organize.)
By the way, the reason why I use this method every time is that as the OS evolves, problems occur such as changing the location of each folder and leaving unnecessary folders and files behind. Therefore, even if it is troublesome, make sure to migrate Mail data to prevent problems by using reading.
Genuine email app restoration has ended. thank you for your hard work.
- -Part1- Mac OS Catalina 10.15 Still immersed in configuration work
- -Part2- No solution for macOS Catalina 10.15 Time Machine
- -Part3- macOS Catalina 10.15 Where to Sync iPhone?
- -Part4- macOS Catalina 10.15 Time Machine Emergency Response Edition
- -Part6- macOS Catalina 10.15 Music Migration Reference
- -Part7- macOS Catalina 10.15 Time Machine problem solved and suggested in 10.15.1
- -last- Reset music with macOS Catalina 10.15.1